Rail4でGoogle Place APIを利用した位置情報検索サービスの作成
キーワードで位置情報を検索して検索結果の任意の情報をDBへ保存、そして、DBへ保存した位置情報をGoogle Mapsで表示するアプリケーションを作ってみます。
キーワードから位置情報を検索するのに、Google Places APIのRuby用のラッパーライブラリであるmarceldegraaf/google_placesをRails4アプリケーションにインストールします。
DBへ保存した位置情報をGoogle Mapsで表示させるのに、gmaps4railsをRails4アプリケーションにインストールします。
また、作成したアプリケーションはherokuにpushしますのでRailsのデータベースドライバとしてPostgreSQLを選択します。
PostgreSQLの準備
PostgreSQLインストール
データベースユーザ作成
PostgreSQLにpostgresユーザで接続します。
1
| |
create userSQLを実行して、データベースユーザとしてgoogle_place_sampleをDB作成権限を付与して作成します。
1
| |
Railsプロジェクト作成
Railsプロジェクト作成
新しいRailsプロジェクトを作成します。
1 2 3 | |
therubyracer
GemfileのJavascriptエンジンであるtherubyracerの設定行をアンコメントします。
1 2 | |
therubyracerライブラリをインストールします。
1
| |
PostgreSQLデータベース接続設定
PostgreSQLデータベース接続情報に接続データベースユーザの情報を追記します。
1 2 3 4 5 6 7 8 9 10 11 12 13 14 15 16 17 18 19 20 21 22 | |
Bootstrap3インストール
Gemライブラリのインストール
Gemfileに追記します。
1 2 3 4 5 6 7 8 | |
Gemライブラリをインストールします。
1
| |
bootstrap-sassを使用する準備
今回はSassというプリプロセッサに対応したbootstrap3をインストールしているのですが、CSSの//= require行はSassでは文法として使用できない>ので注意が必要です。そして、Sass拡張子のファイルやその他のスタイルシートであっても、Bootstrapからmixinsや変数を利用できないので//= require>行は利用できないということです。
本家GiHubのREADMEに従い、app/assets/stylesheets/application.cssは削除します。
1
| |
app/assets/stylesheets/application.css.scssを新規作成します。
1 2 | |
app/assets/javascripts/application.jsにBootstrap関連のJavascriptsライブラリをrequireします。
1
| |
app/views/layouts/application.html.erbのheadタグにbootstrap関連のスタイルシートをincludeする設定とメディアクエリーを使用するためのviewport設定を追記します。
1 2 | |
ナビゲーションメニュー
1 2 3 4 5 6 7 8 9 10 11 12 13 14 15 16 17 18 19 20 21 22 23 | |
Jumbotron(ジャンボトロン)
app/assets/stylesheets/theme-style.css.scssを作成し、スタイルを追加します。
1 2 3 4 5 6 7 8 9 10 11 12 13 14 15 16 17 18 | |
app/assets/stylesheets/application.css.scssに作成したtheme-style.css.scssを読む込むように設定します。
1
| |
次にJumbotron(ジャンボトロン)を表示するためのコードを記述します。
1 2 3 4 5 6 7 8 9 10 | |
Railsのフラッシュメッセージ表示
コントローラ内でModelの保存や削除の成功/失敗などのメッセージを変数に格納された場合にはJumbotron(ジャンボトロン)の上部にします。
1 2 3 4 5 6 7 8 9 | |
google_placesライブラリでキーワードから位置情報を取得する
https://github.com/marceldegraaf/google_placesをインストールすることで、東京 焼き肉とか沖縄 しまぶた屋などのキーワードで検索して位置情報などを取得することができるようになります。
Gemライブラリのインストール
Gemfileに追記します。
1 2 3 | |
Gemライブラリをインストールします。
1
| |
コントローラとビューの生成
今回はscaffoldで生成しません。
rails g controllerコマンドを使用してコントローラとビューを生成します。
| アクション名 | 役割 | ビューの生成 |
|---|---|---|
| index | 検索フォームと登録済み位置情報テーブル | |
| list | Google place API検索結果の表示 | |
| show | 当該レコードの位置情報を表示 | |
| create | 当該位置情報をDBへ保存 | |
| destroy | 当該位置情報をDBから削除 |
1
| |
app/controllers/place_controller.rb
1 2 3 4 5 6 7 8 9 10 11 12 13 14 15 16 17 18 19 20 21 22 23 24 25 26 27 28 29 30 31 32 33 34 35 36 37 38 39 40 41 42 43 44 45 46 47 48 | |
app/views/place/index.html.erb
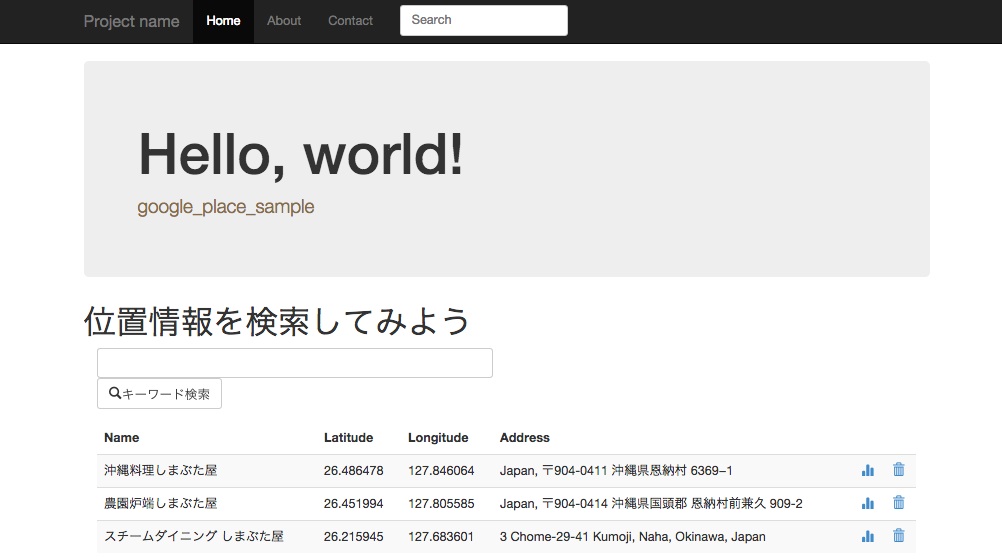
1 2 3 4 5 6 7 8 9 10 11 12 13 14 15 16 17 18 19 20 21 22 23 24 25 26 27 28 29 30 31 32 33 34 35 36 37 38 39 40 41 42 43 | |
app/views/place/list.html.erb
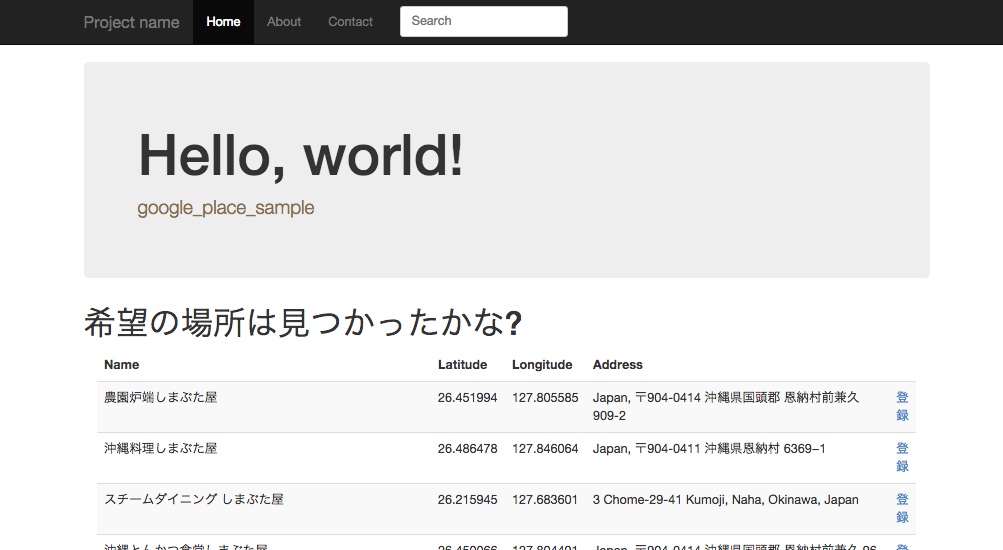
1 2 3 4 5 6 7 8 9 10 11 12 13 14 15 16 17 18 19 20 21 22 23 24 25 26 27 28 29 30 31 32 33 34 35 36 | |
app/views/place/show.html.erb
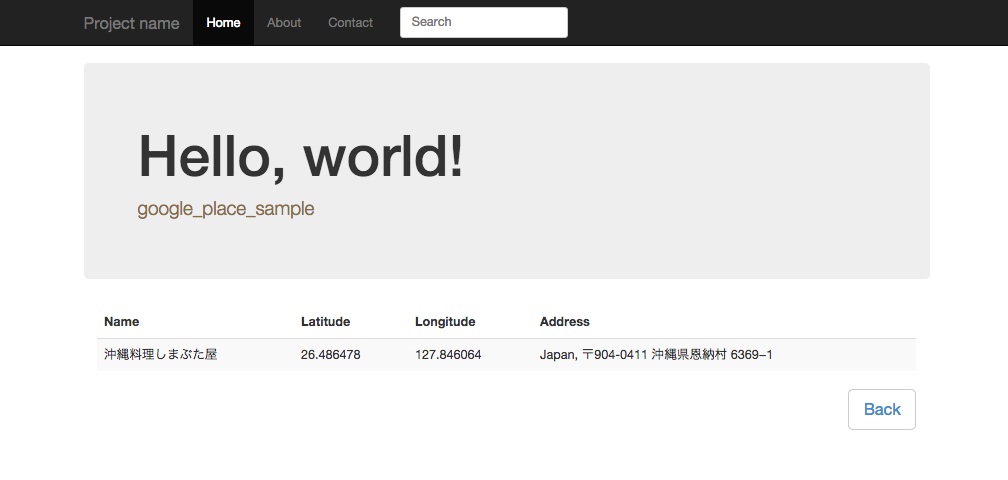
1 2 3 4 5 6 7 8 9 10 11 12 13 14 15 16 17 18 19 20 21 22 23 24 25 | |
モデルの生成とDBマイグレーション
位置情報を保存するためのplaceモデルを生成します。
1
| |
DBを作成、マイグレーションを実行します。
1 2 | |
ルーティング設定
1 2 3 4 5 6 7 8 9 10 | |
ここまでのサンプルアプリケーション
google_placeライブラリを使った位置情報検索サンプルアプリケーション
gmaps4railsライブラリでDBに保存した位置情報からマップを作成する
ここまでの作業でキーワード検索でリストアップされた施設の位置情報をDBへ保存することが出来ました。
ここで保存している位置情報とは施設名、住所、経度、緯度です。
経度と緯度の情報があればGoogle Maps上にマークを表示させることが出来ます。
apneadiving/Google-Maps-for-Rails (gmaps4rails)ライブラリを利用することで簡単にDBに保存された経度、緯度を使用してGoogle Mapsを利用できます。
Gemライブラリのインストール
1 2 3 4 | |
Gemライブラリをインストールします。
1
| |
gmaps4railsライブラリの使用準備
app/views/layouts/application.html.erbのheadタグにGoogle Maps関連のライブラリを読み込む設定を追記します。
1 2 | |
app/assets/javascripts/application.jsにGoogle Maps関連のJavascriptsライブラリをrequireします。
1 2 | |
underscore/underscore.jsをapp/assets/javascripts/underscore.jsとして作成します。
Google Mapsをレスポンシブで表示するスタイルシート
app/assets/stylesheets/gmap4rails.css.scss
1 2 3 4 5 6 7 8 9 10 11 12 13 14 15 16 | |
app/assets/stylesheets/gmap4rails.css.scssをimportします。
1
| |
showアクションでMapを表示する
app/controllers/place_controller.rb
1 2 3 4 5 6 7 | |
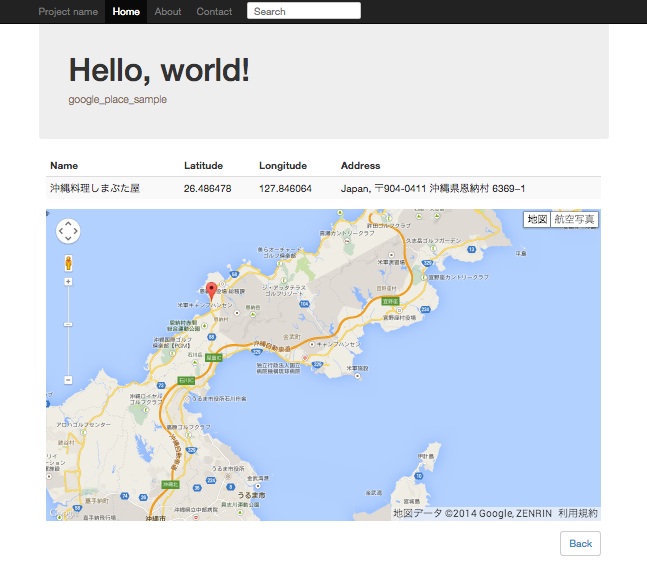
app/views/place/show.html.erb
先述したapp/views/place/show.html.erbの</table>タグと<button type="button" class="btn pull-right btn-lg btn-default">タグの間に以下コードを追記します。
1 2 3 4 5 6 7 8 9 10 11 12 13 14 15 | |
無事、Google Mapsが表示されました!
ここまでのサンプルアプリケーション
google_placeとgmaps4railsライブラリを使った位置情報検索サンプルアプリケーション
CentOS6でPostgreSQLインストール
Rails4でBootstrap3を使う(ついでにherokuへpush)で書いたエントリーからPostgreSQLインストール手順を抜き出しただけのエントリーです。
PostgreSQLの準備
PostgreSQLインストール
PostgreSQLの公式yumレポジトリからインストールします。
1 2 | |
PostgreSQLインストール直後のデータベースディレクトリである/var/lib/pgsql/9.3/dataを削除してデータベースを初期化(initdb)し、postgresql-9.3サービスを起動します。ついでに、自動起動も設定します。
1 2 3 4 | |
PostgreSQLの認証方式をPeerからTrustへ変更
https://www.postgresql.jp/document/9.3/html/auth-methods.html
PostgreSQLではデフォルトの認証方式としてPeer認証が設定されています。Peer認証とは、カーネルからクライアント上のシステムユーザ名を取得し、PostgreSQLデータベースユーザと同一である場合のみ接続が許可される仕組みです。PostgreSQLでは、デフォルトではpostgresデータベースユーザしか存在しないため、UnixユーザもPostgreSQLをパッケージインストールすると作成されているpostgresである必要があります(su - postgresしないとダメということ)。
Peer認証だとUnixのスーパーユーザであるrootであってもpostgresデータベースユーザへの接続は許可されません。
1 2 3 4 5 | |
今回は、サーバに接続できる全Unixユーザから全データベースユーザへの接続が許可されるTrust認証に変更します。
Peer認証からTrust認証への変更は/var/lib/pgsql/9.3/data/pg_hba.confを修正します。
1 2 | |
設定ファイルを修正したのでpostgresql-9.3サービスを再起動します。
1
| |
Railsアプリケーション用のデータベースユーザを作成
PostgreSQL 9.3ではCREATE USERはCREATE ROLEの別名になりました。 唯一の違いは、CREATE USERという名前でコマンドが呼び出されると、デフォルトでLOGINになり、CREATE ROLEという名前でコマンドが呼び出されると、デフォルトでNOLOGINとなる点です。
https://www.postgresql.jp/document/9.3/html/sql-createuser.html
PostgreSQLのスーパーユーザであるpostgresデータベースユーザで接続します。
1
| |
今回作成するRailsアプリケーションのプロジェクト名と同一のbootstrap3_sampleというデータベースユーザを作成し、データベース作成権限とログイン権限を持つように設定します。
1
| |
上記SQLは以下コマンドと同じ効果があります
1
| |
createuserコマンドはpostgresql93(末尾の数字はバージョン番号なので適宜目置換を!)RPMパッケージに付属しているPostgreSQLのデータベースユーザ(正確にはロール)を作成するためのコマンドです。SQLでのユーザ作成とは異なり、コマンドでパスワード文字列を指定することは出来ず、-Pオプションによってパスワード文字列を指定するプロンプトが表示されます。
データベースユーザのパスワードがシステムカタログ上に保存される際に暗号化するかどうかはENCRYPTED/UNENCRYPTEDで明示するか、そうでない場合は、/var/lib/pgsql/9.3/data/postgresql.confのpassword_encryption設定パラメータに依ります。password_encryption設定パラメータがonの場合に暗号化が有効(default: on)です。
先述した通り、create userSQLはログイン権限オプション(login)を明示しなくても有効となりますし、createuserコマンドでもログイン権限オプション(–login)がデフォルトで有効なので、ここでは指定していません。この辺りのSQLやコマンドの挙動はPostgreSQLバージョンにも依ると思うので自信の無い場合はログイン権限オプションを明示した方がいいかもしれません。
Rails4でBootstrap3を使う(ついでにherokuへpush)
今まではRailsアプリケーションのデザインを独学でCSS書いたりjQueryプラグイン入れたりしてたのですが、今更ながらboootstrapを利用しようと思い始めました。
Ruby on RailsでBootstrap3をインストールする手順を纏めておきます。
今回はRailsアプリケーションのプロジェクト名としてbootstrap3_sampleという文字を使用することにします。
また、ここで使用しているRailsバージョンはRails 4.1.6です。
1 2 3 | |
作成したアプリケーションはherokuにpushしますのでRailsのデータベースドライバとしてPostgreSQLを選択します。それに併せてPostgreSQLのインストールや設定についても自分への備忘録として残しておきます。
Bootstrapを使用するまで
PostgreSQLの準備
PostgreSQLインストール
PostgreSQLの公式yumレポジトリからインストールします。
1 2 | |
PostgreSQLインストール直後のデータベースディレクトリである/var/lib/pgsql/9.3/dataを削除してデータベースを初期化(initdb)し、postgresql-9.3サービスを起動します。ついでに、自動起動も設定します。
1 2 3 4 | |
PostgreSQLの認証方式をPeerからTrustへ変更
https://www.postgresql.jp/document/9.3/html/auth-methods.html
PostgreSQLではデフォルトの認証方式としてPeer認証が設定されています。Peer認証とは、カーネルからクライアント上のシステムユーザ名を取得し、PostgreSQLデータベースユーザと同一である場合のみ接続が許可される仕組みです。PostgreSQLでは、デフォルトではpostgresデータベースユーザしか存在しないため、UnixユーザもPostgreSQLをパッケージインストールすると作成されているpostgresである必要があります(su - postgresしないとダメということ)。
Peer認証だとUnixのスーパーユーザであるrootであってもpostgresデータベースユーザへの接続は許可されません。
1 2 3 4 5 | |
今回は、サーバに接続できる全Unixユーザから全データベースユーザへの接続が許可されるTrust認証に変更します。
Peer認証からTrust認証への変更は/var/lib/pgsql/9.3/data/pg_hba.confを修正します。
1 2 | |
設定ファイルを修正したのでpostgresql-9.3サービスを再起動します。
1
| |
Railsアプリケーション用のデータベースユーザを作成
PostgreSQL 9.3ではCREATE USERはCREATE ROLEの別名になりました。 唯一の違いは、CREATE USERという名前でコマンドが呼び出されると、デフォルトでLOGINになり、CREATE ROLEという名前でコマンドが呼び出されると、デフォルトでNOLOGINとなる点です。
https://www.postgresql.jp/document/9.3/html/sql-createuser.html
PostgreSQLのスーパーユーザであるpostgresデータベースユーザで接続します。
1
| |
今回作成するRailsアプリケーションのプロジェクト名と同一のbootstrap3_sampleというデータベースユーザを作成し、データベース作成権限とログイン権限を持つように設定します。
1
| |
上記SQLは以下コマンドと同じ効果があります
1
| |
createuserコマンドはpostgresql93(末尾の数字はバージョン番号なので適宜目置換を!)RPMパッケージに付属しているPostgreSQLのデータベースユーザ(正確にはロール)を作成するためのコマンドです。SQLでのユーザ作成とは異なり、コマンドでパスワード文字列を指定することは出来ず、-Pオプションによってパスワード文字列を指定するプロンプトが表示されます。
データベースユーザのパスワードがシステムカタログ上に保存される際に暗号化するかどうかはENCRYPTED/UNENCRYPTEDで明示するか、そうでない場合は、/var/lib/pgsql/9.3/data/postgresql.confのpassword_encryption設定パラメータに依ります。password_encryption設定パラメータがonの場合に暗号化が有効(default: on)です。
先述した通り、create userSQLはログイン権限オプション(login)を明示しなくても有効となりますし、createuserコマンドでもログイン権限オプション(–login)がデフォルトで有効なので、ここでは指定していません。この辺りのSQLやコマンドの挙動はPostgreSQLバージョンにも依ると思うので自信の無い場合はログイン権限オプションを明示した方がいいかもしれません。
Railsプロジェクトの作成
新しいRailsプロジェクトを作成します。
1 2 3 | |
データベース接続情報を設定
1 2 3 4 5 6 7 8 9 10 11 12 13 14 15 16 17 18 19 20 21 22 | |
Gemライブラリのインストール
Rails4でBootstrap3をインストールする簡単な方法はGemライブラリを使用することです。
今回はTwitter社公式のbootstrap-sassを使用します。
比較はしていませんが、anjlab-bootstrap-railsなどもあり、anjlab/anjlab-widgetsが使えることなどが特徴のようです。こちらのGemはbootstrap-sassとの併用は推奨されていないようです。
Gemfileに追記します。therubyracerはアンコメントすれば有効になります。
1 2 3 4 5 6 7 8 9 10 11 | |
Railsプロジェクト作成時のGemfileと比較するとこのようになります。
1 2 3 4 5 6 7 8 9 10 11 12 13 14 15 16 17 18 19 20 21 22 23 | |
Gemライブラリをインストールします。
1
| |
bootstrap-sassを使用する準備
今回はSassというプリプロセッサに対応したbootstrap3をインストールしているのですが、CSSの//= require行はSassでは文法として使用できないので注意が必要です。そして、Sass拡張子のファイルやその他のスタイルシートであっても、Bootstrapからmixinsや変数を利用できないので//= require行は利用できないということです。
本家GiHubのREADMEに従い、app/assets/stylesheets/application.cssは削除します。
1
| |
app/assets/stylesheets/application.css.scssを新規作成します。
1 2 | |
app/assets/javascripts/application.jsにBootstrap関連のJavascriptsライブラリをrequireします。
1
| |
app/views/layouts/application.html.erbのheadタグにbootstrap関連のスタイルシートをincludeする設定とメディアクエリーを使用するためのviewport設定を追記します。
1 2 | |
scaffoldで骨組みを生成
scaffoldを実行します。
1 2 3 | |
root_pathの設定
scaffoldで生成されたentriesリソースのindexをroot_pathに設定します。
1
| |
ここでブレイク
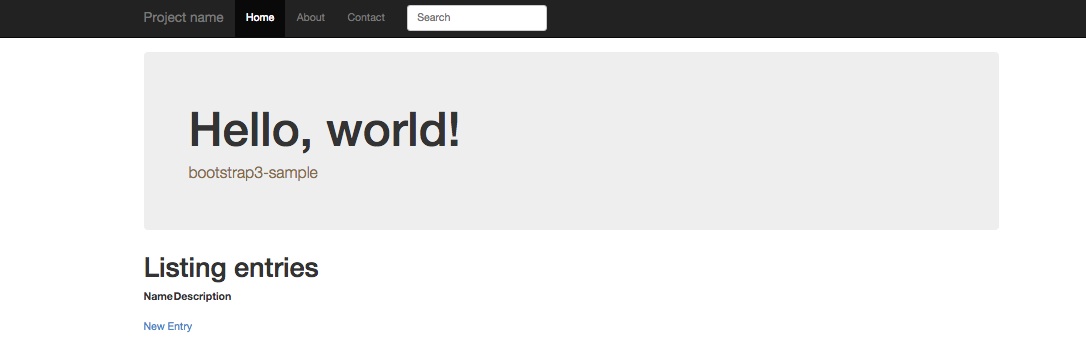
この段階でrails serverコマンドを実行してWEBrickを起動すると以下のような画面が表示されます。
- http://< サーバIP >:3000
ここからBootstrapを使っていきます
ナビゲーションメニュー

bodyタグの上部にナビゲーションメニューを設置してみます。
1 2 3 4 5 6 7 8 9 10 11 12 13 14 15 16 17 18 19 20 21 22 23 | |
Jumbotron(ジャンボトロン)
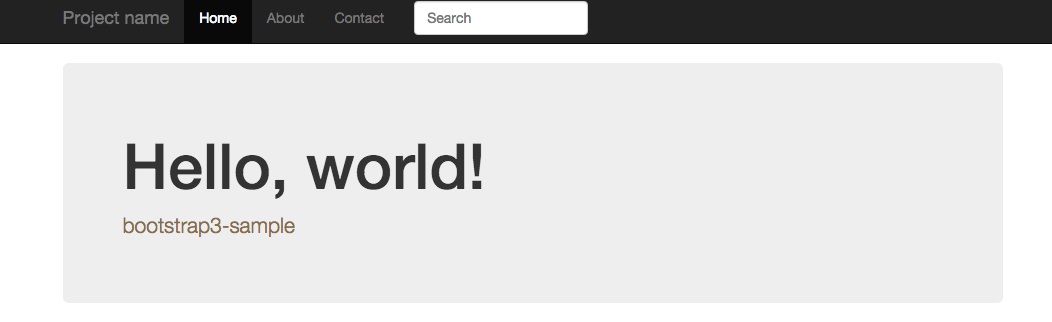
Jumbotron(ジャンボトロン)と呼ばれるページトップなどに表示する見出しユニットをbodyタグの上部、ナビゲーションメニューの下あたりに設置してみます。
まず、app/assets/stylesheets/theme-style.css.scssを作成し、スタイルを追加します。
1 2 3 4 5 6 7 8 9 10 11 12 13 14 15 16 17 18 | |
app/assets/stylesheets/application.css.scssに作成したtheme-style.css.scssを読む込むように設定します。
1
| |
次にJumbotron(ジャンボトロン)を表示するためのコードを記述します。
1 2 3 4 5 6 7 8 9 10 | |
Railsのフラッシュメッセージ表示
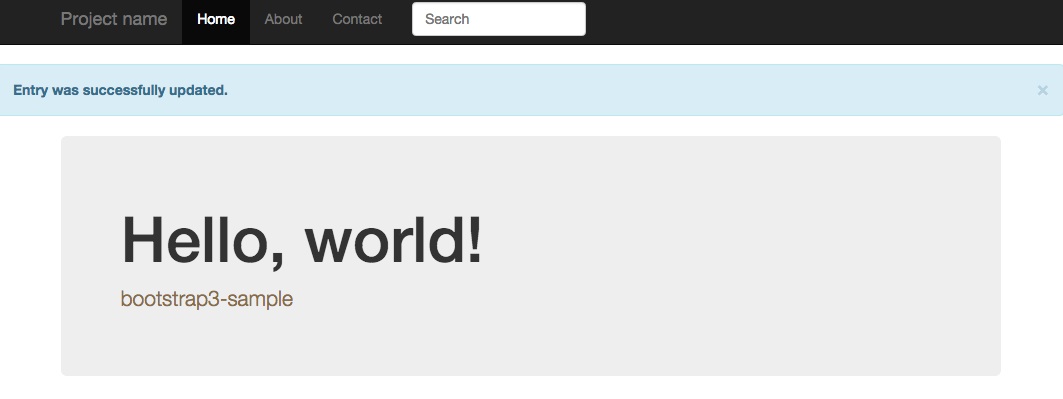
後述するapp/views/entries/show.html.erbに<%= notice %>というフラッシュメッセージを表示するコードがscaffoldによって自動生成されているのですが、Bootstrap3のAlertsコンポーネントを使って見栄えを良くすると同時に、先述したJumbotron(ジャンボトロン)の上部に表示するためにapp/views/layouts/application.html.erbに移動しlます。
1 2 3 4 5 6 7 8 9 | |
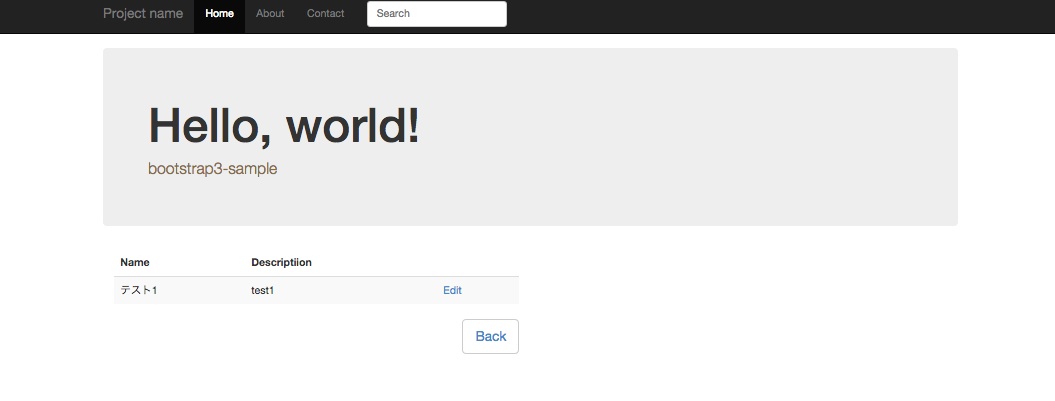
entriesリソースのビューファイルを修正
scaffoldで生成したビューファイルに色々とBootstrap3のスタイルを適用していきます。
app/views/entries/index.html.erb

1 2 3 4 5 6 7 8 9 10 11 12 13 14 15 16 17 18 19 20 21 22 23 24 25 26 27 28 | |
app/views/entries/show.html.erb
1 2 3 4 5 6 7 8 9 10 11 12 13 14 15 16 17 18 19 20 21 22 23 | |
app/views/entries/new.html.erb
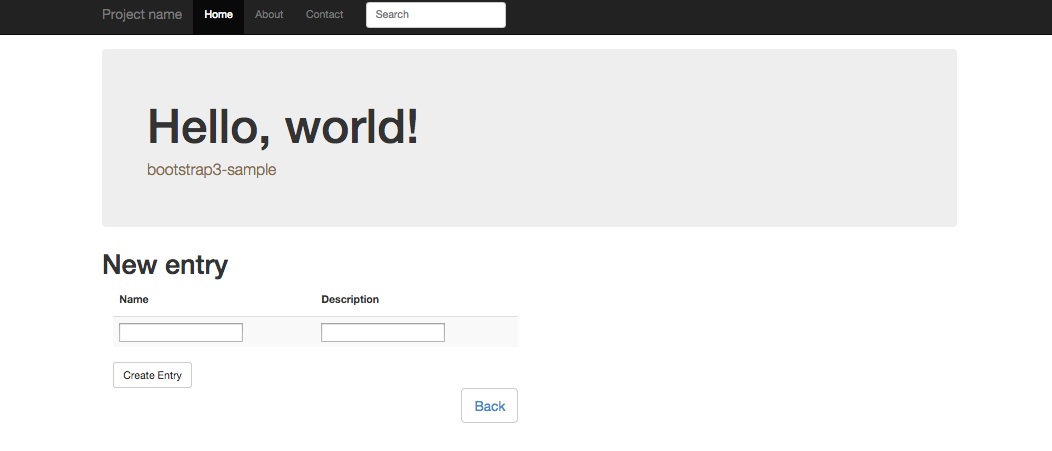
1 2 3 4 5 6 7 8 9 10 | |
app/views/entries/edit.html.erb
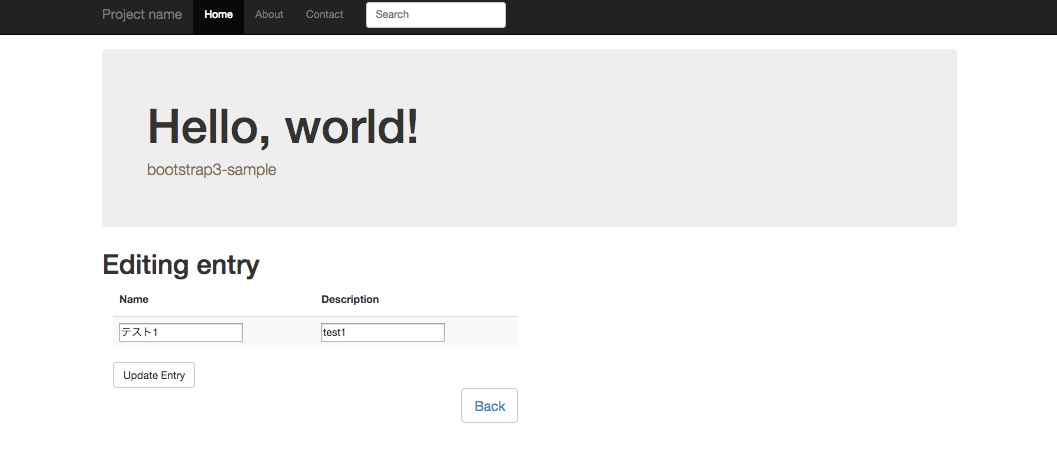
1 2 3 4 5 6 7 8 9 10 | |
app/views/entries/_form.html.erb
1 2 3 4 5 6 7 8 9 10 11 12 13 14 15 16 17 18 19 20 21 22 23 24 25 26 27 28 29 30 31 | |
herokuにpushしてみる
https://devcenter.heroku.com/articles/getting-started-with-rails4
Herokuを使う準備
production環境でのアセットコンパイルを有効にする
config/environments/production.rbを修正してproduction環境でのassetsを有効にします。
以下の設定パラメータを設定します。
1 2 3 4 | |
修正後のconfig/environments/production.rbのdiff情報です。
1 2 3 4 5 6 7 8 9 10 11 12 13 14 15 16 17 18 19 | |
gitレポジトリを作成
herokuに対するアプリケーションのデプロイ方法はgit pushを行うことなので、ローカル環境でgitレポジトリを作成します。
1 2 3 4 | |
herokuにアカウントを登録
heroku toolbelt インストール
heroku toolbeltとは、heroku appsの作成や管理を行うためのHerokuクライアントで、実体はherokuコマンドファイルです。
herokuコマンドをインストールする方法は、OSプラットフォームにより3パターンあります。
- Mac OSX、またはWindowsではパッケージが提供されていますのでパッケージをダウンロードしてインストールします。
- Debian/Ubuntuにもdeb形式のパッケージが公開されていますが、こちらは直接ダウンロードするのではなくインストールスクリプトを利用します。
- Debian/Ubuntu以外のUnix/Linuxではxzファイルフォーマットで圧縮されたtarボールで配布されています。こちらもインストールスクリプトを利用します。
今回はCentOS6なので3番目のインストールスクリプトを利用します。https://toolbelt.heroku.com/standaloneの内容に沿ってインストールします。
注意点としては、インストールスクリプトの実行はsudo権限を持つユーザである必要があります(中でsudoを実行しているため)。
1
| |
これで/usr/local/heroku/bin以下にherokuコマンドがインストールされるので、$PATH環境変数に/usr/local/heroku/binへのパスを設定しておきます。
1
| |
heroku toolbelt を使ってherokuへログイン
herokuコマンドラインツールを使ってログインします。先ほど作成したherokuアカウントのメールアドレスとパスワードを入力し、Authentication successful.と表示されればログイン成功です。また、該当Unixユーザでのログインが初めての場合は公開鍵認証に関する設定を行う場合があります。
1
| |
heroku appsを作成
今回はbuf-material-bootstrap3-sampleという名前のアプリケーションをheroku上に作成します。
1
| |
コマンドの結果が以下のように表示されます。
URLがhttp://buf-material-bootstrap3-sample.herokuapp.com/で、heroku上に作成されるgitレポジトリのURLがgit@heroku.com:buf-material-bootstrap3-sample.git となりました。
1 2 3 | |
heroku appsにアプリケーションをデプロイ & DBマイグレーション
herokuへのアプリケーションデプロイはなんとgit push heroku master1発なのです!
DBマイグレーションをお忘れなく。
1 2 | |
これで http://buf-material-bootstrap3-sample.herokuapp.com/ にアクセスすると先ほどローカル環境で見ていたアプリケーション画面が表示されました。
OctopressにGoogle AdSenseを導入する
Google AdSenseとは
広告収入を稼ぐためのアフィリエイトサービスと言えばいいのでしょうか。
詳細は、Google AdSenseについてwikipediaから転記します。
### http://ja.wikipedia.org/wiki/Google_AdSense から転記

Google AdSense(グーグルアドセンス)はGoogleの提供している検索連動型およびコンテンツ連動型広告の広告配信サービスの総称である。

AdSenseは、Googleが広告ネットワークに対して提供する配信サービスの総称であり、その形態は多岐にわたる。
コンテンツ向けAdSenseは所有するWebサイト(ブログでも可)にGoogle AdSenseの広告コードを貼り付けると広告が表示され、その広告がクリックされると報酬が得られる仕組みである。Google AdSenseのシステムが自動的にサイトの内容を解析し、そのサイトにあったコンテンツ連動型広告を配信するシステムである[1]。例えば、ゴルフ関連のサイトなら、自動的にゴルフの広告が表示されるよう設計されている(サイトの内容によっては、それと関連する適切な広告がなく、まったく分野の異なる広告が表示されることもある)。Googleでの検索履歴から広告が表示されることもある[2]。 日本では2003年12月一般向けに募集を開始[3]したことでブロガーなどに広まり急速にシェアを広げた。
その他、ウェブページ内に検索の機能を提供し、検索キーワードに関連する広告を表示する検索向けAdSense、RSSフィードの記事内にAdSense広告を自動的に表示するフィード向けAdSense[4]などがある。
ということで、Google AdSenseを使用してOctopressサイト内に広告を表示してみようと思います。
Google AdSense側の設定
所有サイトのURLを追加する(任意)
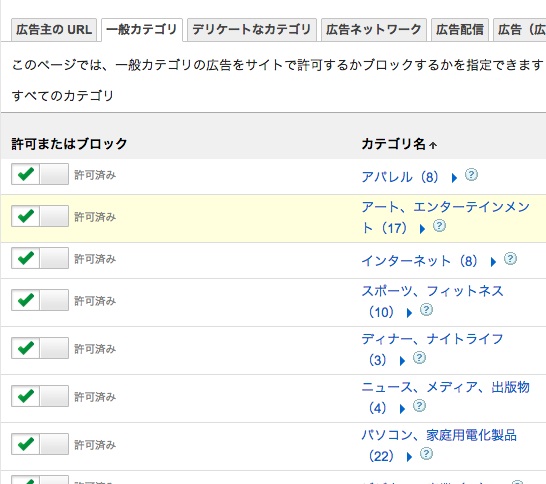
所有サイトとしてサイトのURLを登録しておくことでサイト固有の広告ブロック ルールを作成するなど、サイトに関連する操作を行うことができるようになるようです。具体的には、特定広告主URLや広告ネットワーク、特定カテゴリに関わる広告を表示させたくない場合等に非表示設定をおこなうことが可能です。
Google AdSenseへGoogleアカウントにてログインし、アカウント > サイト管理の順にページを移動します。
下の画像のようなテキスト入力フォームがあるので、広告を表示させたいサイトのトップURLを入力し、サイトを追加します。

広告ユニットを作成し、コードを取得する
Google AdSenseにおける広告は広告タイプ(テキスト広告とディスプレイ広告、テキスト広告のみ、ディスプレイ広告のみ)や広告サイズ(468x60、160x600、レスポンシブ、など)を定義した広告ユニットが広告の生成単位となり、広告コードもこの広告ユニット単位で生成されます。
サイドバー向けの広告ユニットを作成します。
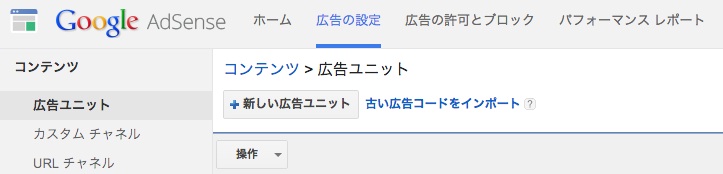
[広告の設定] > [コンテンツ] > [広告ユニット]までページを進め、+新しい広告ユニットをクリックします。
名前は、あとで広告ユニットを特定しやすいように一意の名前と説明を入力するといいでしょう。
今回はbuf-material_aside_336x280とします。
広告サイズは最初に表示されている推奨から選ぶと無難かもしれません。これら推奨の広告サイズはGoogle AdSense側で広告の掲載効果があったとされる広告サイズのようです。今回は336x280 レクタングル (大)を選択します。
また、モバイルで効果的な広告サイズにはモバイルのアイコン()が表示されます。
広告サイズに関しては、プレビューを選択することでポップアップで実際の大きさを確認できますので参考に出来ますね。
広告タイプは、テキスト広告とディスプレイ広告、テキスト広告のみ、ディスプレイ広告のみの3つから選択します。今回は推奨されているテキスト広告とディスプレイ広告を選択します。
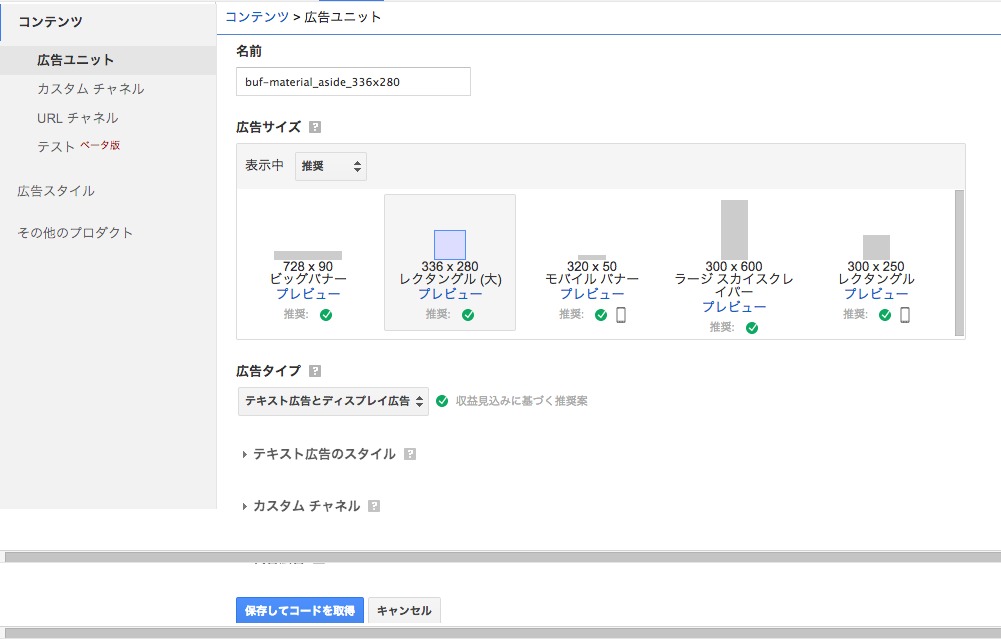
保存してコードを取得を選択し、コードを取得します。
Octopress側の設定
今回は、広告をサイドバーに表示してみようと思います。
Octopressではサイドバーのコンテンツはセクションごとにsource/_includes/custom/asides/ディレクトリ以下にHTMLファイルを用意し、_config.yml内のdefault_asides:に表示させたいファイル名をリストで持つことになっています。
サイドバーに表示するHTMLの準備
source/_includes/custom/asides/google_adsense_336x280.htmlとして作成します。この時、Octopress側で1つのセクションであることを定義するために一番外枠として<section>と</section>で括るようにします。
1 2 3 4 5 6 7 8 9 10 11 | |
_config.yml の設定
_config.ymlのdefault_asides:にgoogle_adsense_336x280.htmlを追記します。この広告はサイドバーの最上段に表示させたいので、default_asides:リストの1番上に記述します。
1 2 3 4 5 6 | |
静的ファイルの再生成とデプロイ
静的ファイルを再生成します。
1 2 3 4 | |
GitHub Pagesへデプロイします。
1
| |
確認
GitHub Pagesへアクセスした際に表示されるHTMLコードを確認し、<aside>タグ内に以下のscriptコードが組み込まれていれば設定できています。
1 2 3 4 5 6 7 8 9 10 11 | |
OctopressにGoogle Analyticsを導入する
Google Analytics
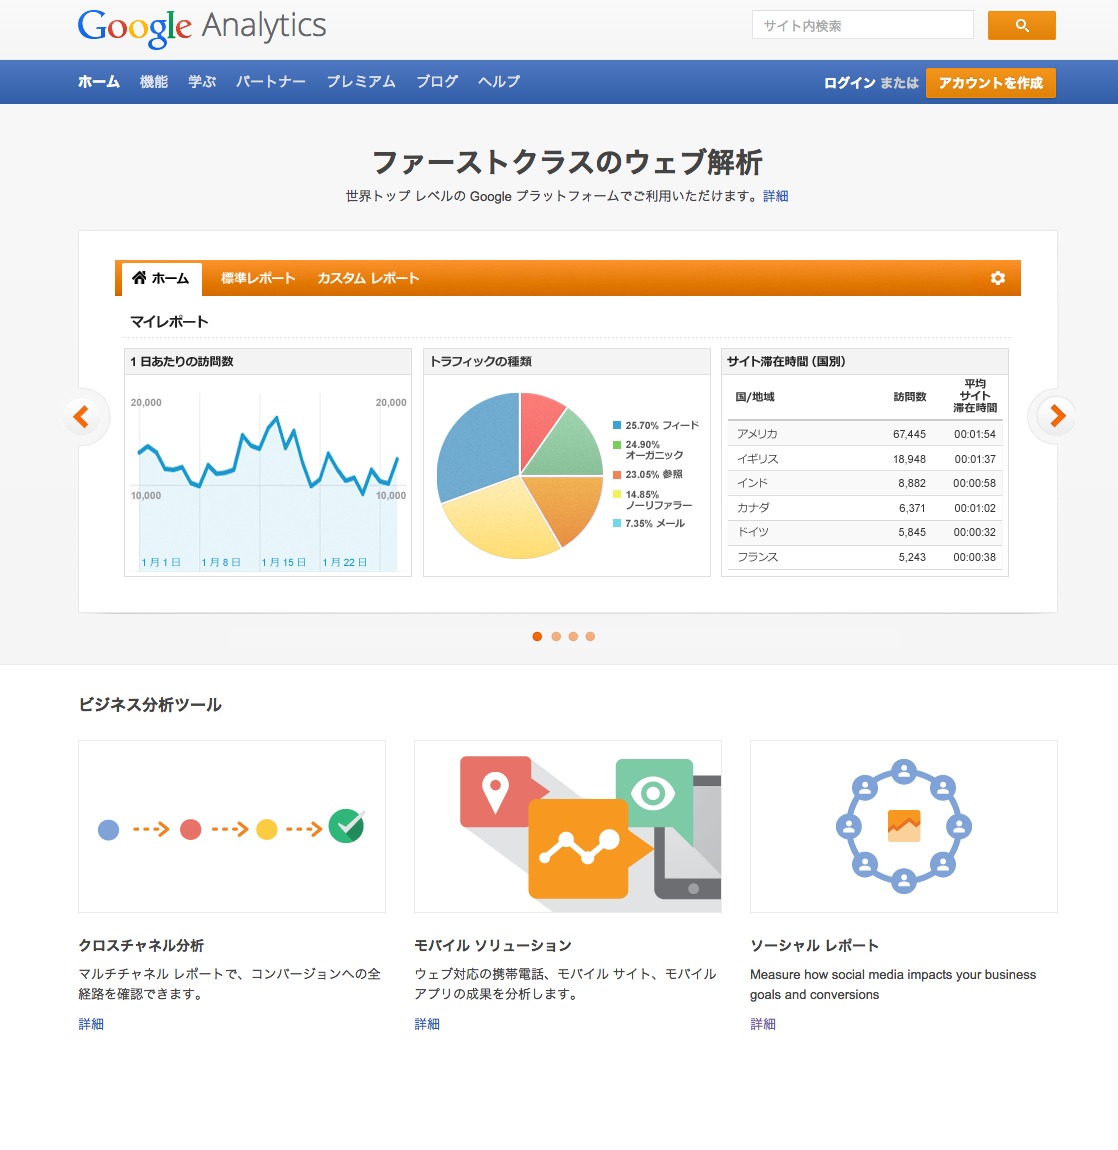
Google AnalyticsはGoogleが提供するアクセス解析ツールです。
サイトページ内にトラッキングコードと呼ばれるJavaScript コードを埋め込み、訪問者がサイトへアクセスした際の閲覧情報がGoogle Analyticsサーバへ送信される仕組みです。Webサーバのアクセスログ等を解析する等とは違い、開発者はこのトラッキングコードを埋め込むだけでアクセス解析ツールを利用できるという手軽さと、様々なアクセス情報を取得・閲覧できることが特徴です。
Octopressの場合、このトラッキングコードの大枠のコードがテーマのテンプレートHTMLファイルとして用意されているケースがあります。このような場合には_config.ymlのgoogle_analytics_tracking_id:という箇所にトラッキング IDを記述するだけです。
トラッキング IDとはUA-000000-01のような文字列で、データの送信先となるアカウントやプロパティを Google アナリティクス側で特定するためのIDです。
トラッキングIDの取得
先述したトラッキング IDを取得します。
Google AnalyticsからGoogleアカウントでログインし、アナリティクス設定 > 管理 > 新しいアカウント の順にアクセスし、サイト情報を登録してトラッキングIDを取得します。
取得したトラッキングIDを設定
Octopressでは既にGoogle Analytics用のテンプレートHTMLが用意されているテーマもあり、デフォルトのClassicや先日変更したoctostrap3でも同様です。
### Octopress Themesに組み込まれているGoogle Analyticsテンプレート

octopress
└── .themes
    ├── octostrap3
    |   └── source
    |       └── _includes
    |           └── google_analytics.html
    |
    └── classic
        └── source
            └── _includes
                └── google_analytics.html
従って、設定は_config.ymlのgoogle_analytics_tracking_id:の項に先ほど取得したトラッキングIDを記述して静的ファイルを再生成するだけでいいようです。
1
| |
静的ファイルの再生成とデプロイ
静的ファイルを再生成します。
1 2 3 4 | |
GitHub Pagesへデプロイします。
1
| |
確認
GitHub Pagesへアクセスした際に表示されるHTMLコードを確認し、HEADタグ内に以下のscriptコードが組み込まれていれば設定できています。
1 2 3 4 5 6 7 8 9 10 | |
Google Analyticsのアクセス解析結果が表示させるまで24時間程度かかるので表示されるのを待ちましょう。
Octopressのテーマをclassicからoctostrap3に変更してみる
デフォルトテーマ
Octopressではデザインテーマをinstallタスクにてインストールします。デフォルトでインストールされるテーマはclassicです。
installタスクの動作を理解する
Octopressでテーマを適用するinstallタスクの動作を見てみようと思います。
下記コードはOctopressのRakefileに記述されたinstallタスクです。
1 2 3 4 5 6 7 8 9 10 11 12 13 14 | |
コードを見ても分かる通り、installタスクで実行していることは以下の6つの事だけで、とてもシンプルな動作です。#{theme}はデフォルトではclassicが代入される変数です(上記コードの6行目)。
sourceディレクトリを作成.themes/#{theme}/sourceディレクトリ以下のファイルやディレクトリを再帰的にsourceディレクトリにコピーsassディレクトリを作成.themes/#{theme}/sassディレクトリ以下のファイルやディレクトリを再帰的にsassディレクトリにコピーsource/_postsディレクトリを作成publicディレクトリを作成
テーマのインストール
テーマのインストールに必要な作業は以下の3つだけです。
.themesディレクトリ以下にインストールしたいテーマをプロジェクトごとコピーする.themes/octostrap3/のようになる
- installタスクをインストールしたいテーマを明示して実行する
rake 'install[octostrap3]'のようになる
generateタスクを実行して静的ファイルを生成する
octostrap3テーマをインストールする
今回はOctostrap3をテーマとしてインストールしてみます。
octostrap3プロジェクトを.themesディレクトリ以下にcloneしてきます。
1
| |
.themesディレクトリ以下はこのようなディレクトリ構成になるはずです。
### octostrap3テーマをローカル環境にcloneした状態
octopress
└── .themes/
    ├── classic
    └── octostrap3
Octopressのinstallタスクをテーマを指定して実行
1
| |
Octopressのgenerateタスクを実行して静的コンテンツを生成
1
| |
これでサイトのデザインテーマをoctostrap3に変更できました!
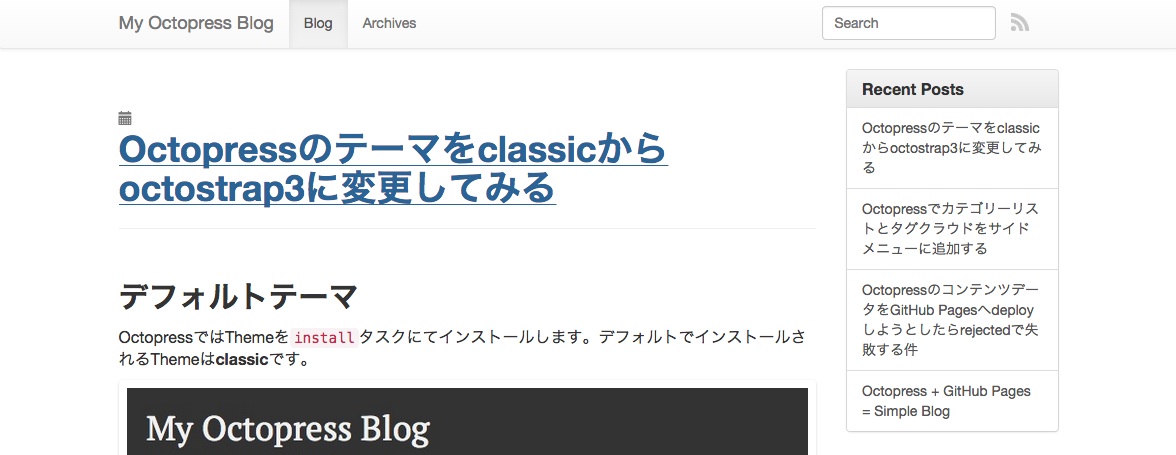
と思ったらサイドサイドメニューのoctopress-tagcloud プラグインで生成されているulタグのデザインがoctostrap3に合っていない...
これはoctopress-tagcloudプラグインをインストールした際に置いたテンプレートファイルの書き方を修正することで対応できます。
octopress-tagcloud プラグイン向けのHTMLテンプレートファイルを修正
プラグインを利用してコンテンツを生成している場合、source/_includes/custom/asidesディレクトリ以下にコンテンツ生成用のHTMLテンプレートファイルを配置していると思います。
今回、デザインテンプレートをclassicからoctostrap3に変更したので、追加したテンプレートファイルのdivなどのブロック構成、classやidなどのデザインに関わるコードもoctostrap3のデザインに合う様に修正しようと思います。
ちょうど、octostrap3のブログページにCategory List Asideという記事でサイドメニューにカテゴリーリストを追加するためのテンプレートコードが掲載されていましたのでそのまま利用させて頂きます。
修正対象ファイル
以下のディレクトリツリーにある2つのHTMLファイルを修正します。
### octostrap3導入にあたって修正するテンプレートファイルのパス
octopress
└── source/
    └── _includes
        └── custom
            └── asides
                ├── category_list.html
                └── tag_cloud.html
修正
source/_includes/custom/asides/category_list.html
1 2 3 4 5 6 7 8 9 10 11 12 13 14 | |
source/_includes/custom/asides/tag_cloud.html
1 2 3 4 5 6 | |
簡単でした!
Octopressでカテゴリーリストとタグクラウドをサイドメニューに追加する
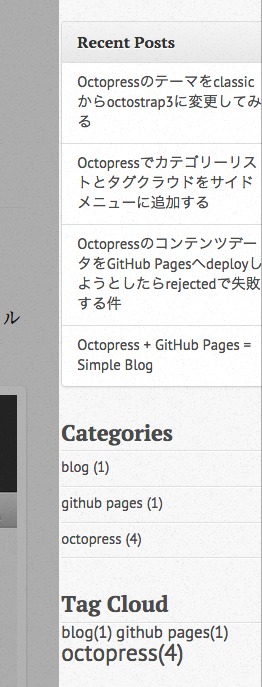
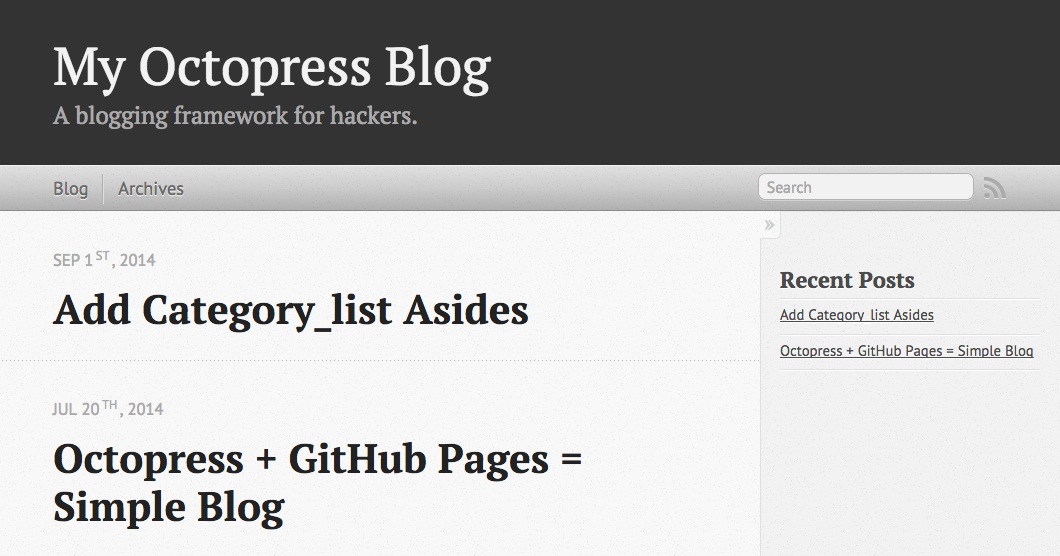
デフォルトのサイドメニュー
Octopressをインストールした直後は、サイドメニューはRecent Postsのみです。
そこでOctopress向けに公開されているプラグインを使ってサイドメニューにカテゴリーリストとタグクラウドを実装します。
プラグイン
jekyllには、特定コンテンツをHTMLとして生成してあなたのサイトに表示させるためのプラグインという仕組みを持っています。そして同時に、多くのプラグインが作成・公開されています。
imathis/octopressはjekyllのためのフレームワークであり、静的コンテンツ生成にはjekyllを使用しているため、もちろんプラグインを導入することが可能です。
tokkonopapa/octopress-tagcloud プラグインのインストール
tokkonopapa/octopress-tagcloudのソースコードをcloneして、jekyllプラグインインストール作法に準じてファイルを配布します。
1 2 3 | |
jekyllの設定ファイル_config.ymlにtokkonopapa/octopress-tagcloud プラグインで生成する静的ファイルをサイドメニューのコンテンツとして使用するための設定を記述します。
Octopressの_config.ymlにdefault_asides:から始まる行があります。default_asides:はサイドメニューに表示するHTMLファイルを配列で記述していきます。
1 2 3 4 5 | |
静的ファイルを生成してWebサーバを起動します。
1 2 3 4 | |
これでサイドメニューに以下画像のようなカテゴリーリストとタグクラウドが表示されたはずです。
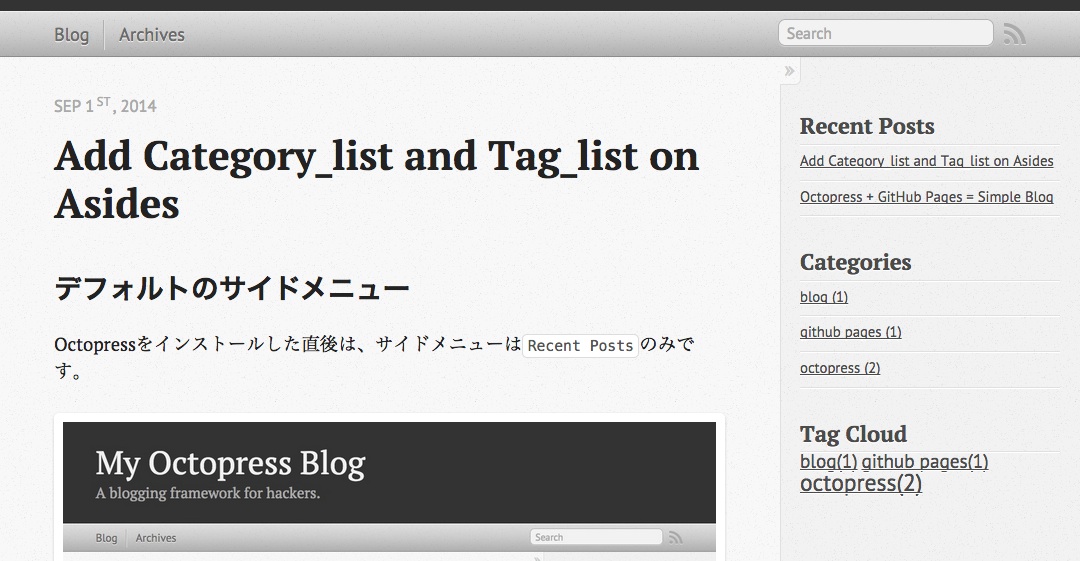
簡単でした!
OctopressのコンテンツデータをGitHub Pagesへdeployしようとしたらrejectedで失敗する件
OctopressをGitHub pagesでホスティングさせているのですが、GitHubレポジトリへのdeployタスクがrejectedとなって失敗してしまうことがあります。
1 2 3 4 5 6 7 8 9 10 11 | |
暫定対処
他にも解決方法があるかもしれませんので暫定と思っています。
OctopressのRakefileに記述されているdeployタスク内で実行されているpushタスクをforceオプションで実行します。
git pushコマンドのremoteレポジトリ名の頭に+を付加することでforceオプションと同じ効果を付加できるようです。
1 2 3 4 5 6 7 8 9 10 11 | |
Octopress + GitHub Pages = Simple Blog
いきなりですが、ブログを開設したいと思いました。
VimやMarkdownの勉強も兼ねることができるので、Octopress + GitHub Pagesで書いてみることにします。
Octopress

Octopressとは、mojombo/jekyllという静的ファイルジェネレータのためのフレームワークです。
jekyllがMarkdownでの記事作成に対応しているのでエンジニアの方で利用されている方が多いようです。
- HTML5,レスポンシブデザイン対応
- デフォルトのテンプレートデザインで既にレスポンシブデザイン対応
- Compass,Sassを用いたデザイン
- 記事の新規作成やローカルレビューなどの操作はrakeタスクに纏まっていてシンプル
- ローカルで作成した記事を反映させる方法は、
Github pagesやRsyncを利用Github pagesの場合はgithubへpushして更新
-
POW,WEBrick,thinなどのRackサーバをサポート - カラースキームとしてsolarizedを採用することで美しいシンタックスハイライトを実現
- Markdownで記事を作成可能
GitHub Pages

GitHub Pagesとは、username.github.ioというレポジトリに静的コンテンツを置くことでWebサイトとして公開できるものです。
WebサイトのデフォルトURLはレポジトリ名と同じhttp://username.github.ioとなります。
ちなみに、usernameは自分のGitHubアカウント名に置き換えてください。
GitHub PagesとしてWebページを作成することでコンテンツをGit管理にできるほか、GitHubレポジトリに置けることでバックアップとしての意味合いも果たします。
そして、GitHub Pagesでは静的ファイルジェネレータのmojombo/jekyllを使ったブログ作成が可能なので、Octopressもインストール可能なのです。
Octopressをローカル環境にインストール
今回の最終目標はGitHub PagesでOctopressのエントリー記事を表示させることですが、記事作成などの主な操作はローカル環境で行う必要があります(GitHubレポジトリの内容を直接操作することはできない)。ローカル環境で記事作成などの操作を行った後にGitHubへPushすることでGitHub Pagesに反映させるのです。
Octopressのソースコードをgit cloneでローカル環境に持ってきます。
ローカル環境側のRubyバージョンが1.9.3以上の必要があるので、rbenvやrvmなどでインストールしておきます。
1 2 | |
gemモジュール群をインストールします。私の環境では、Could not find a JavaScript runtimeエラーが発生するのを防ぐために、therubyracerプラグインも一緒にインストールします。
Gemfileに追記します。
1 2 | |
Gemfileに記述されているGemモジュール、および依存関係のあるGemモジュールをインストールします。
1
| |
rake installコマンドを実行してOctopress初期セットアップとしてデフォルトテーマ用のファイルをJekyllの静的コンテンツ生成パスにコピーします。
rakeタスク実行時の標準出力をそのまま記載しているのでmkdirやcpはrakeタスク内で実行済みです。
1 2 3 4 5 6 7 8 | |
この段階で初期ページの表示確認は可能なはずですのでrake previewコマンドを実行して、ローカル環境でWebページを公開します。
rake previewコマンドを実行することでRakefile内のpreviewタスクを実行します。previewタスクではjekyll build --watchコマンドを実行して静的コンテンツをジェネレートしつつ、以降の変更を監視し続けます。変更を検知すると再ジェネレートを自動実行してくれます。そしてrackupコマンドを実行し、TCPポート4000番でWEBrickサーバを起動します。
ここでもrake previewタスクの実行時の標準出力を(_config.ymlパス以外は)そのまま記載します。
1 2 3 4 5 6 7 8 9 10 11 12 13 | |
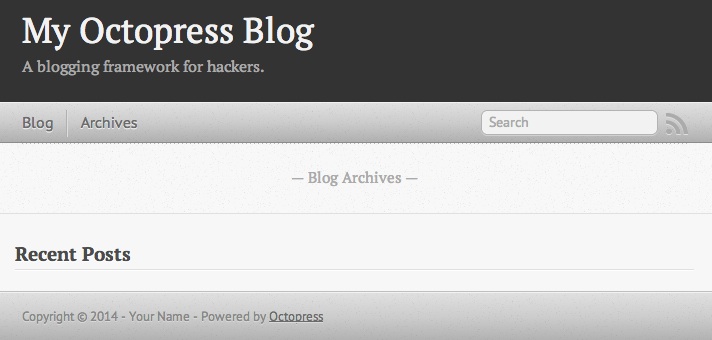
ブラウザでhttp://localhost:4000(localhostの部分はローカル環境のIPアドレスに置き換えてください)にアクセスすると以下のような初期ページが確認できます。
Octopressで指定可能なrakeタスク
Octopressをインストールする際にrake installコマンドやrake previewコマンドを実行しましたが、rakeコマンドの後ろに指定したサブコマンドはRakefileに定義されたタスクに対応しています。
指定可能なrakeタスクはrake -Tコマンドで確認できます。
1 2 3 4 5 6 7 8 9 10 11 12 13 14 15 16 17 18 19 20 | |
記事を投稿する
新しい記事を投稿するためにはrake new_post[title]コマンドを実行します。title部分は任意のタイトル文字を記述します。英字以外だとうまく認識できないケースが考えられるので、ここでは英字で指定します。
1
| |
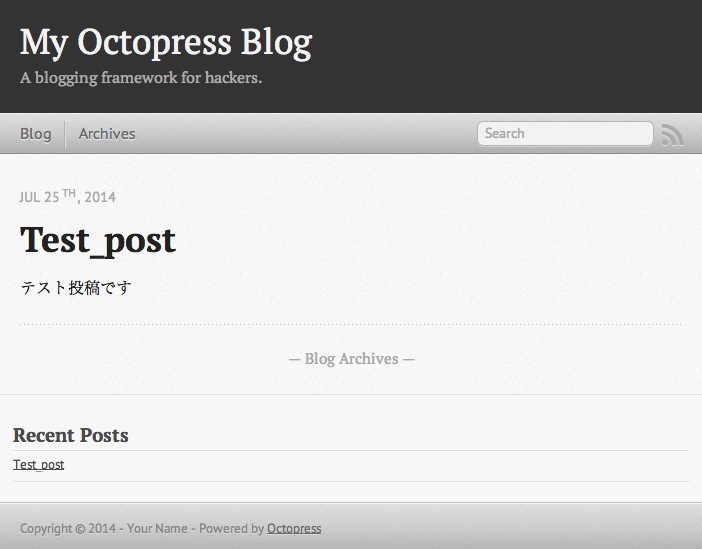
rake new_post[test_post]コマンドでsource/_posts/yyyy-mm-dd-test-post.markdownというファイルが作成されます。
1
| |
テストのために本文を1行だけ追記しました。
1 2 3 4 5 6 7 8 9 | |
静的ページを生成します。
1
| |
サーバを立ち上げます。
1
| |
ブラウザでhttp://localhost:4000(localhostの部分はローカル環境のIPアドレスに置き換えてください)にアクセスします。
OctopressをGithub Pagesで表示させる
今までローカル環境で編集してきたOctopressコードを新規作成した記事と共にGitHubにpushします。
GitHubレポジトリ作成
GitHubの新規レポジトリ作成ページにアクセスします。
Repository nameにusername.github.io(usernameは自分のGitHubアカウント名)を指定し、Create repositoryボタンをクリックします。

ローカル環境にてgitレポジトリの作成
OctopressでGitHub Pagesを利用する場合のgitレポジトリ作成にはsetup_github_pagesという専用のrakeタスクが用意されています。
rake setup_github_pagesコマンドを作成したレポジトリのURLと共に実行します。
- レポジトリのURL例
git@github.com:your_username/your_username.github.io.githttps://github.com/your_username/your_username.github.io
1
| |
GitHub Pagesへ反映
Octopressで記事などをGitHubへpushする時にはdeployタスクを利用します。
1
| |
GitHubにpush後10分程度待つと、http://username.github.ioで先ほどまでローカル環境で表示できていたOctopressページを表示させることに成功しました。
ソースをBitbucketで管理
rake deployコマンドでは、GitHub上に作成されたレポジトリのmasterブランチにmojombo/jekyllの静的コンテンツのみがpushされます。そしてGemfile,Rakefile,sassディレクトリ,sourceディレクトリがレポジトリ管理になっていません。
Deploying to Github Pagesでは、同一レポジトリにsourceブランチを作成してソースをcommit、pushするように説明していますが、ソースは公開する必要はないのでBitbucketで管理します。
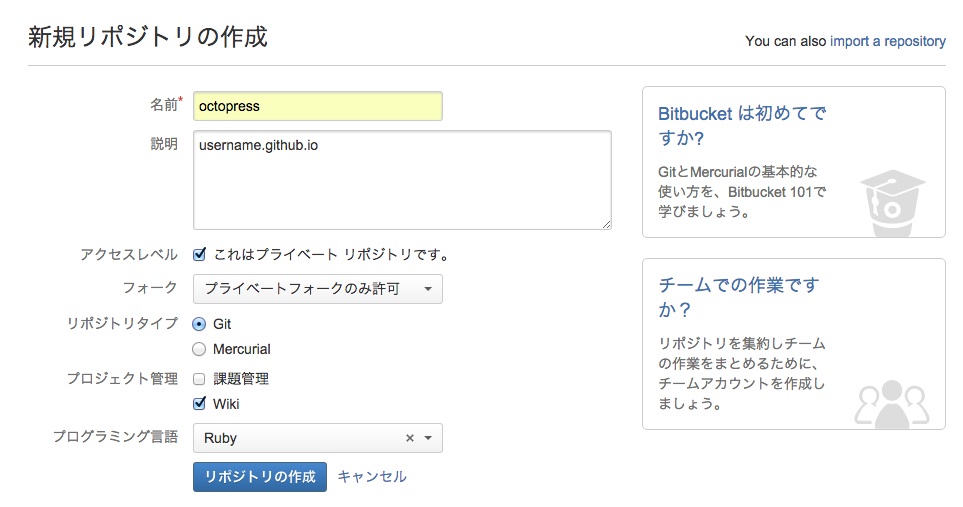
Bitbucketに新規レポジトリを作成
Bitbucketの新規レポジトリ作成ページにアクセスします。
https://bitbucket.org/repo/create
今回はoctopressという名前のレポジトリ`を作成しています。
ソースをコミット
Gemfile,Rakefile,sassディレクトリ,sourceディレクトリなどをレポジトリにコミットします。
1 2 | |
Bitbucketに作成したレポジトリへpush
1 2 | |
まとめ
Octopressのインストール
- https://github.com/imathis/octopress からソースコードをclone
-
rake installを実行して初期セットアップ -
rake new_post['blog_title']で新規記事を投稿 -
rake generateで静的ページを生成 -
rake previewでlocalhostの4000番ポートでWebサーバを起動
GtiHub PagesでOctopressで生成した静的ページを表示
- https://github.com/new で新規レポジトリを作成
Repository nameはusername.github.io(usernameは自分のGitHubアカウント名)
-
rake setup_github_pagesでGitHub pagesを利用するための初期セットアップ -
rake deployでGitHubレポジトリへpush
Bitbucketでソースコード管理
- https://bitbucket.org/repo/create で新規レポジトリを作成
-
git add -Aとgit commitでソースコードをコミット -
git remote addでBitbucketレポジトリをremote先として追加 -
git pushでBitbucketレポジトリにpush